WIDOCO: A WIzard for DOCumenting Ontologies
WIDOCO helps you publish and create an enriched and customized documentation of your ontology, by following a series of steps in a wizard or through the command line. In this tutorial you will learn how to use WIDOCO and all of its functionalities.
1: Download WIDOCO
The easiest way of obtaining WIDOCO is to download one of its released JARs. You can obtain them in the release page of the project. I recommend downloading the latest release.
2: Setting up your project
When you double click on a WIDOCO executable, you will see a window such as the one in the image below (without the red numbers):
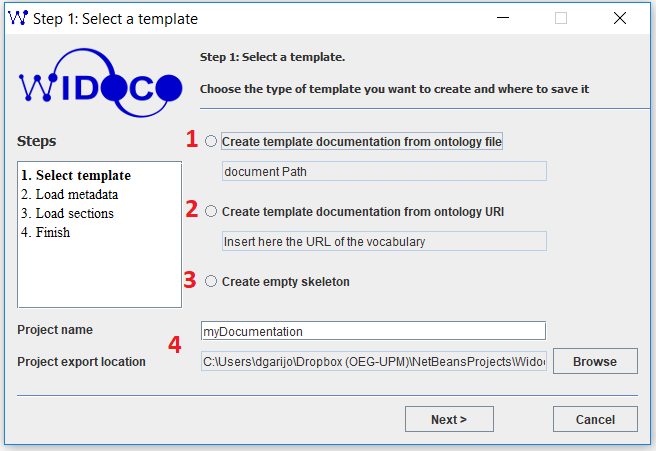
Before doing anything else, it is advisable that you select where do you want to save your project outcomes. You can do this by writing your project name (by default it is "myDocumentation") in the "Project name" field on the bottom (red number 4 in the image). You can also change the folder where your project will be saved by clicking on the "Browse" button next to the previous field. This will change the "Project export location" path below the project name field.
At this point, you have two options:
2.1. Select the target ontology
If you have your ontology saved as a file in your computer, click on "create template documentation from ontology file" (red number 1 in the image above) and select the file within your system. By default, WIDOCO will look for ontology files saved as .rdf, .xml, .ttl or .owl. If you have saved the ontology in another format (e.g., .txt) then select the option "All files" in the "Files of type" option of the file chooser window.
If your file is available on the web under a URI, then click on "create template documentation from ontology file" (red number 2 in the image) and add the ontology URI. You don't need to worry about redirections or content negotiation, as WIDOCO will handle the ontology appropriately and will download it.
Click on "Next" to continue to the next step (Section 3).
2.2. Generate an empty skeleton
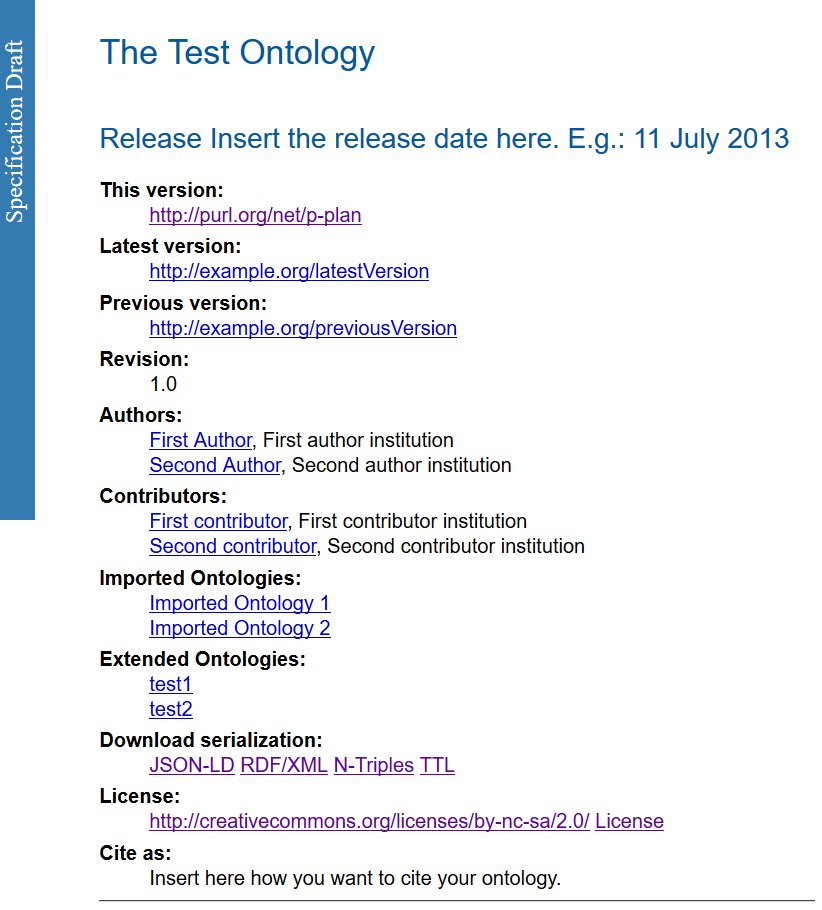
If you are just interested in generating an empty skeleton for your documentation, then click on "Create empty skeleton" (red number 3). This will produce a skeleton documentation with default metadata, but will not generate a cross reference section with the terms of any ontology. The figure below shows an example of an empty skeleton:
3: Loading Ontology Metadata and selecting Language
The next step in the ontology documentation is selecting the right metadata. This step is very important, as it will be the first thing anyone sees when browsing your ontology documentation.
This step presents several options, further described below. Once you think you have described your ontology enough, press the "Next" button.
3.1 Load metadata from the ontology itself
By default, WIDOCO will attempt to explore your ontology and browse its metadata. If you have declared any metadata properties, WIDOCO will likely recognize them. See our best practice document (available in number 8 in red) to better understand which metadata properties are recognize by WIDOCO.
Annotating your ontology is very simple. For example, if you want to annotate who has created your ontology, you may use the property "creator" from the Dublin Core vocabulary. In order to add the annotation to your ontology, just do something like:
<YOUR ONTOLOGY URI> rdf:type owl:Ontology ;
      <http://purl.org/dc/terms/creator> "John Doe"^^xsd:string.
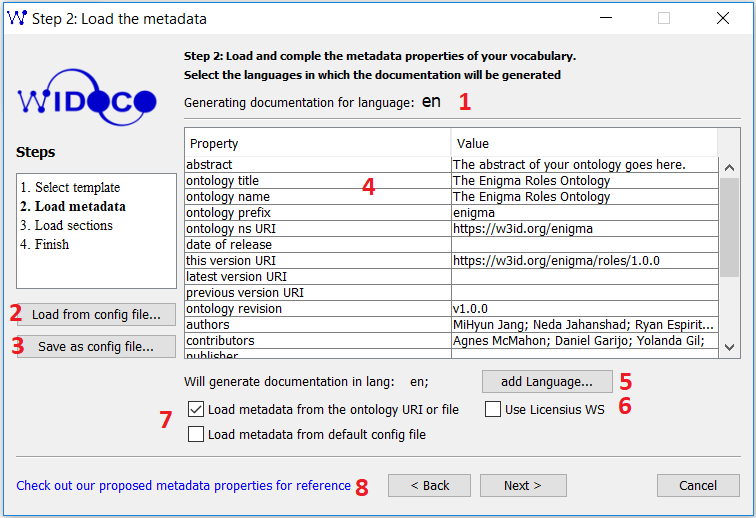
As seen in the figure above, all the metadata found by WIDOCO will be loaded on the table shown in the GUI (number 4 in red). You may then complete any of the fields by just clicking and typing. Remember to press "enter" after finishing writing, otherwise your metadata won't be saved.
3.2 Use a configuration file
If you click on the "Load from config file..." option (number 2 in red in the figure), you will see a menu to select a property file with the metadata fields you want to load. This is convenient when you haven't annotated your ontology with metadata properties.
A sample property file can be found in the following link. If you want to give it a try, just download it, edit it and try it on WIDOCO.
Note that when you load a property file, it will overwrite any properties loaded from the ontology automatically before.
You can edit all values for properties shown in the table (highlited by number 4 in red in the figure). Once you are done, you can save everything by pressing the "Save as config file" button (number 3 in red). As a result, a new .properties file will be saved in your computer in the location where you choose to.
3.3 Generating Documentation in Several Languages
WIDOCO can be configured to generate documentation in different languages. By default, it will just generate it in English (see default selected language in 1). In order to generate documentation in different languages, you have to follow the steps below:
- Click on "Add language ..." (number 5 in the figure). You will see the following menu:
- Select any of the supported languages you want to generate the documentation in. Note that if a language is not supported, the titles of the sections of the document will be in English. Similarly, if you select a language but the ontology does not have labels for it, it will show them in whatever language is the default (English, most likely).
- Click on "Done"
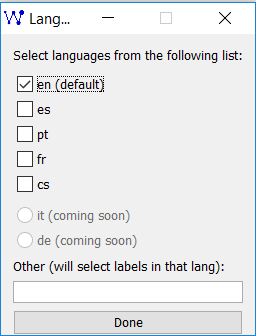
As a result, you should see on the interface the selected languages as in the image below:

WIDOCO generates a documentation for each language, and it will prompt each time whether you want to edit the loaded metadata or not. The language for which the documentation is being generated is shown on top, highlighted with number 1 in red.
3.4 Autocompleting License Metadata
If you have included a license in your metadata but WIDOCO has not recognized it yet, you may try to use this feature (number 6 in red). When you click on the "Use Licensius WS" box, WIDOCO will invoke the Licensius web service to try and find any license metadata. If found, your license URL and name will be completed in the metadata table.
4: Setting up Documentation Options
After clicking on "Next", you will see the final configuration window for WIDOCO:
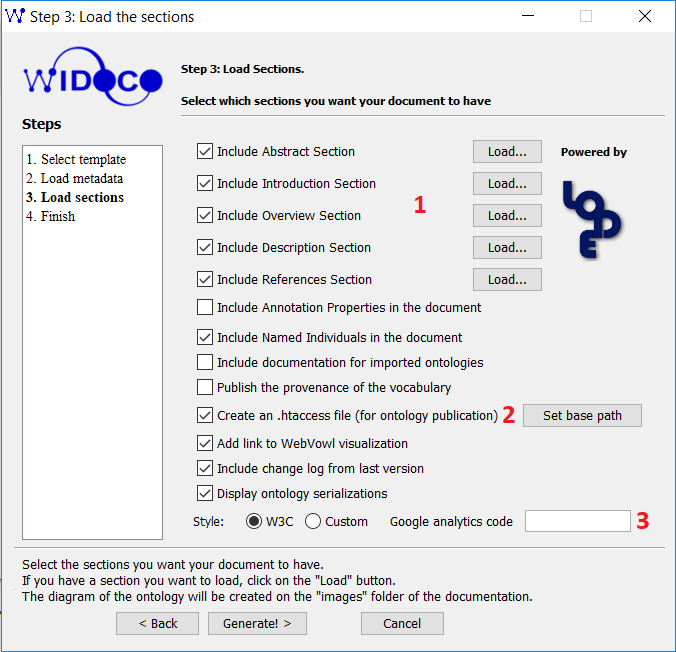
A description of the options is listed below. Once you are done with your selection, click on the "Generate!" button to produce your documentation.
4.1 Selecting Documentation Sections
You can configure which sections you want to include in your document by clicking on the check boxes shown in the figure above (red number 1). You may also load your own HTML if you prefer, by clicking on the "Load..." button that appears next to each section. Don't worry about the styles! Everything will be formatted with a consistent layout.
The sections to include (abstract, introduction, overview, description and references) will include a placeholder text that you can later edit easily. The "Include annotation properties" option, however, will search your ontology for any metadata annotation properties that may have been defined; and the "include named individuals" option will list in the documentation any named individual found. This is particularly useful when you have a few individuals as examples of your ontology terms. However, I discourage choosing this option when a high number of individuals is present in the ontology, as the resultant HTML would be too big.
4.2 Documentation Provenance
Provenance is a record of how a resource was produced. When you select this option in the interface, WIDOCO lists who have been responsible for the creation of the documentation of your ontology (together with a few other details such as the license, creation date, etc.). By default, WIDOCO will take the authors and contributors of the ontology as responsible agents for the document. An additional document with an RDF representation of the provenance record will also be exported.
4.3 Content Negotiation
If you plan to publish an ontology in your own server, you should select the "Create an .htaccess file" option. Content negotiation enables serving multiple serializations of a resource (in this case, your ontology) depending of what is requested. For example, imagine that you want to access the documentation of your ontology from a browser. Since you are a person, you are expecting to see something that you can read about your ontology, like the HTML documentation. However, if the request is issued by a program, such as Protégé, a machine readable representation like RDF/XML or JSON-LD will be preferred.
WIDOCO follows the W3C Best practices for publishing RDF vocabularies, and will prepare the .htaccess file assuming that the current project folder will be deployed on the root folder of your server. However, you can edit the base path by clicking on the "Set base path" option. For more information on how to prepare .htaccess files and their rules for serving content, I recommend having a look at the Apache mod rewrite documentation.
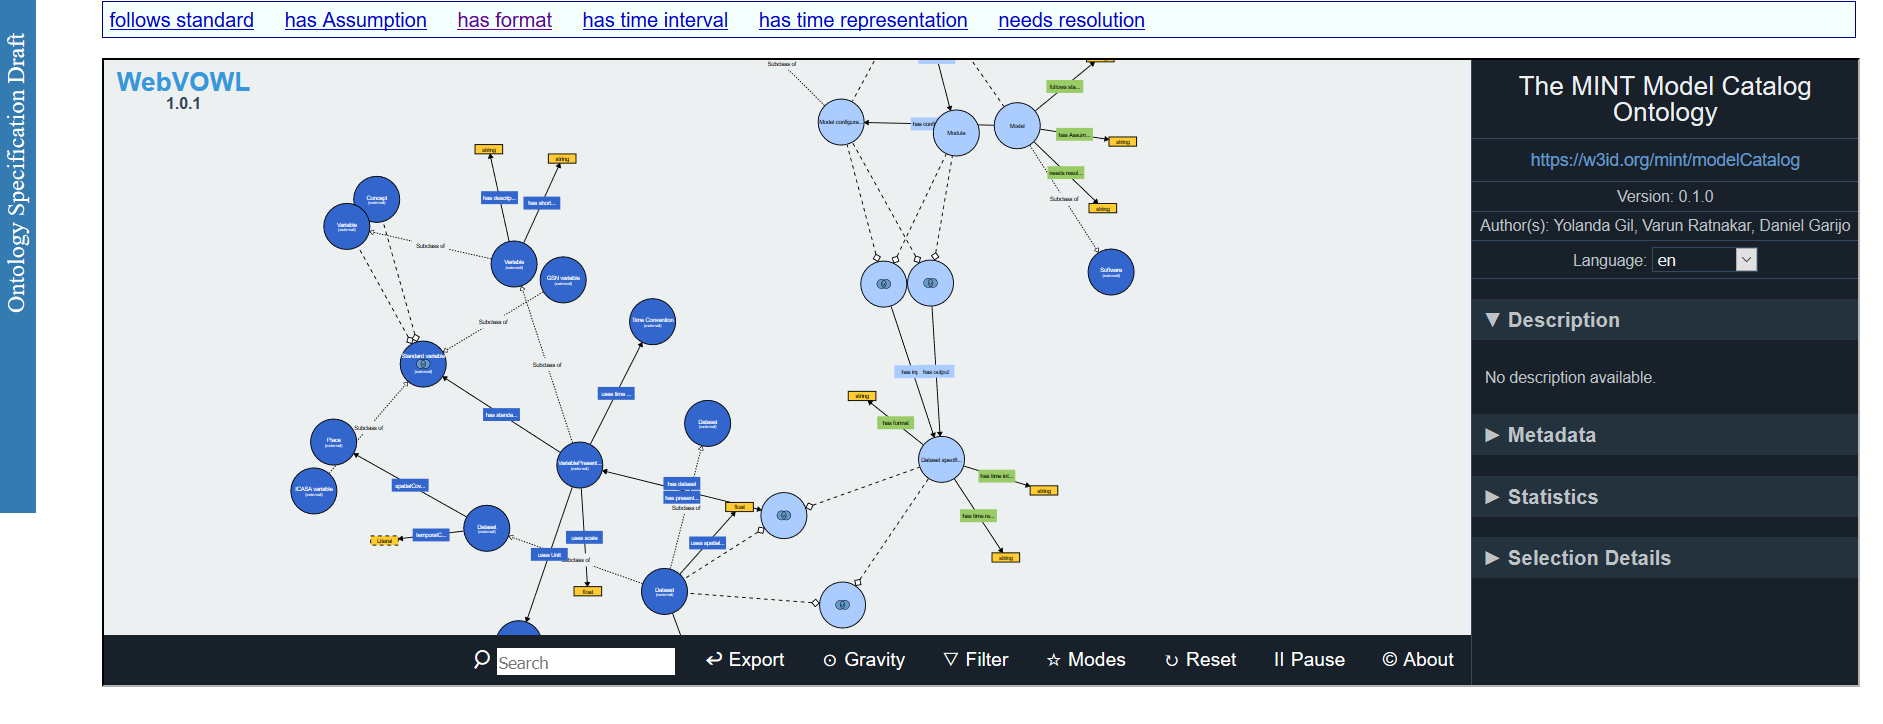
4.4 Visualization
WIDOCO is integrated with WebVowl, a program designed to visualize ontologies. By selecting the option "Add link to WebVowl visualization", WIDOCO will generate and save a diagram of your ontology. An example can be seen in the figure below
4.5 Generating an automated Changelog
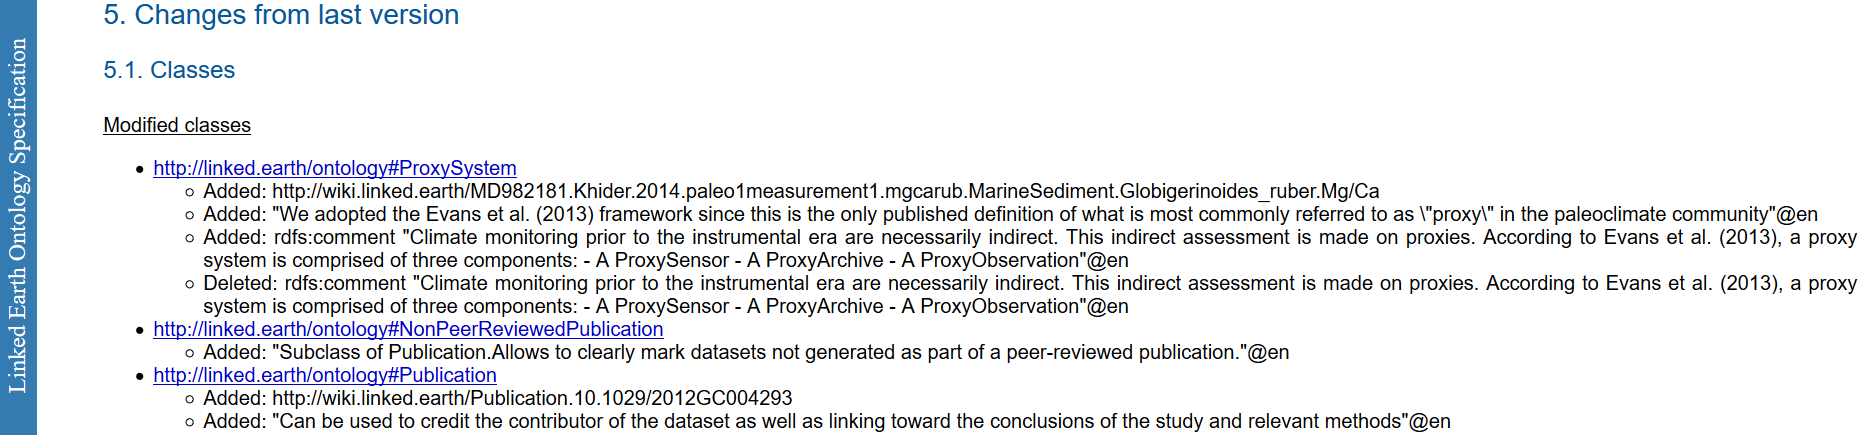
If you select the "Include a change log from last version", WIDOCO will generate a section at the end of the document describing the differences between the current version and the previous one. In order for WIDOCO to be able to generate this changelog, the previous version has to be annotated in the ontology metadata using any of the properties listed on the best practices document (for example, owl:priorVersion).
WIDOCO extends Bubastis, a software generated for creating ontology differences in a human readable manner. An example of a resulting changelog can be seen below:
4.6 Changing default documentation style
You can customize the style in which WIDOCO displays the documentation by editing the CSS included in the main folder. However, one of WIDOCO's users contributed a new stylem used in the BNE ontology. If you like it, just select the "Custom" style option.
4.7 Documentation Analytics
Google analytics is used by many researchers and institutions to measure who accesses your web pages. If you have a code for tracking your website, WIDOCO will include a javascript snippet in the documentation to start tracking your ontology traffic.
5. View, Explore and Evaluate your Documentation
After clicking "Generate!" on the previous step, you will see the following image:
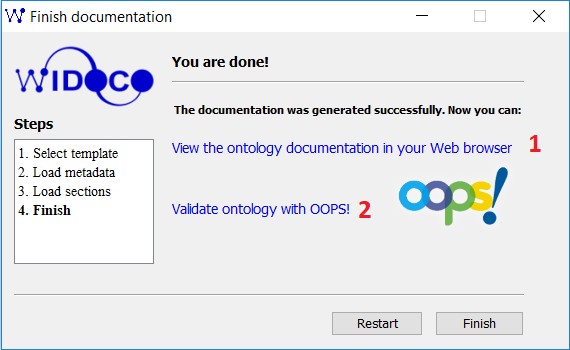
Congratulations! Your documentation has been successfully generated. If you click on "View the ontology documentation in your web browser" (number 1 in red in the figure), the resultant documentation will be opened in a new window. If you use Chrome, you may not see the sections of the document. Don't panic! Sometimes when browsing your ontology in your local computer, the browser deactivates loading local content. You may use another browser to see the content locally, or adopt any of the solutions listed on the WIDOCO readme file. In any case, there should not be an issue when serving the contents from a server.
5.1 Creating an evaluation of your ontology
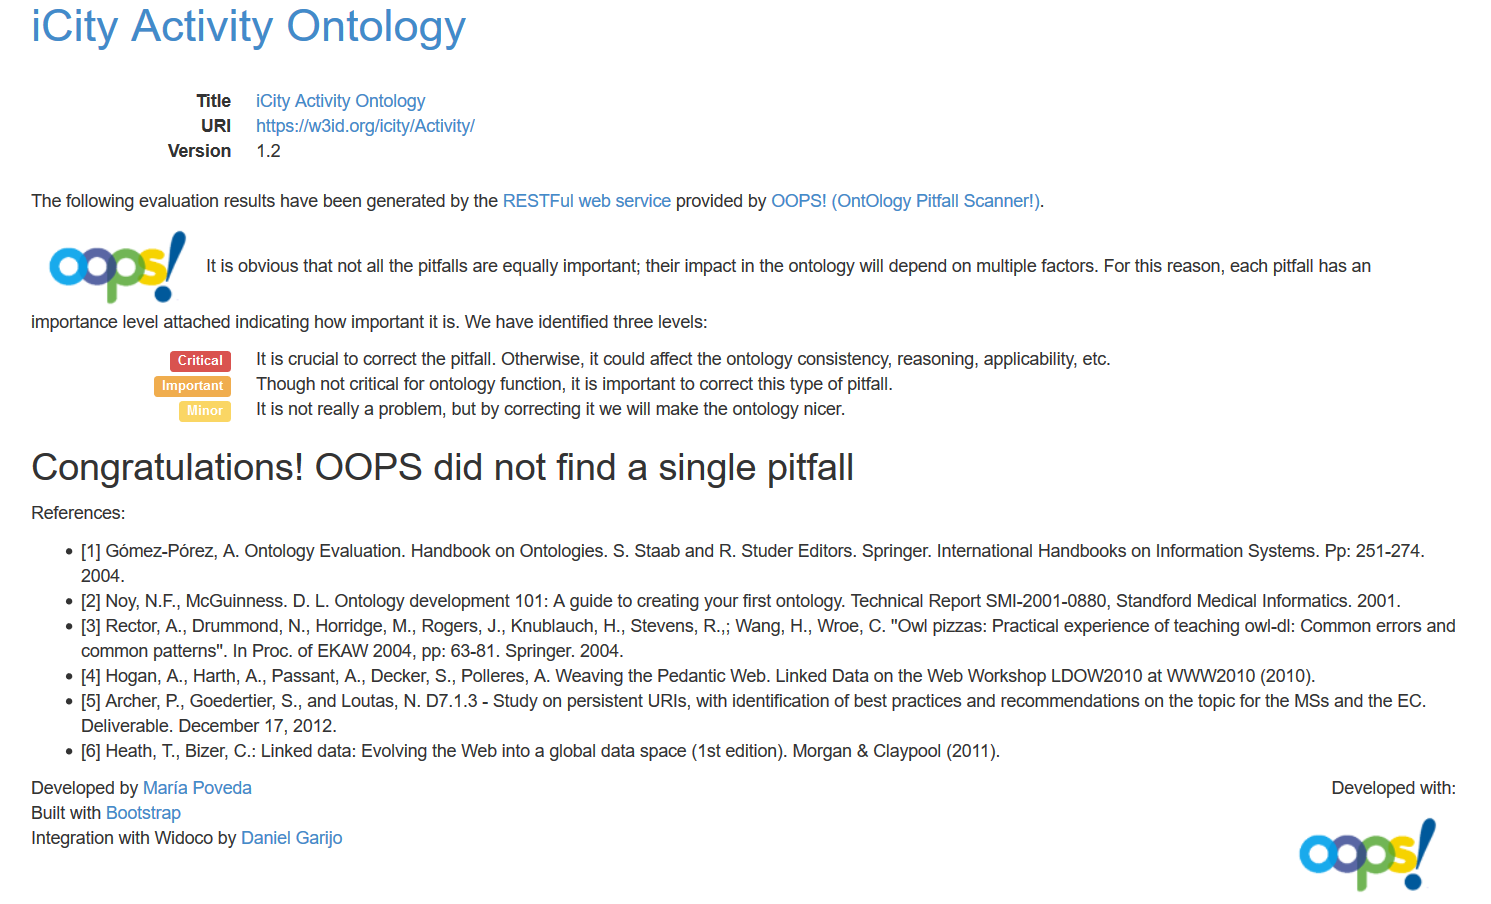
Now that you are done with the documentation, you may get an OOPS! evaluation report by clicking "Validate your ontology with OOPS!" (number 2 in red in the figure above). The report will show potential design pitfalls of your ontology and will be saved in the project folder as an HTML file. If no pitfalls are found, OOPS! will return a page similar to the image below:
5.2 Exploring generated resources
After generating your ontology documentation, your project folder will look very similar to the following image:
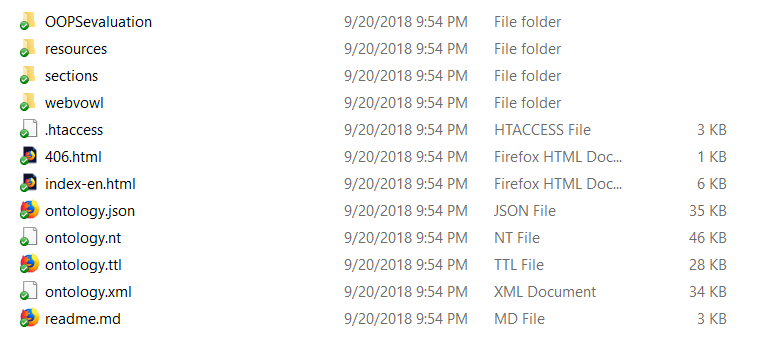
Here is a description of each of them:
- The folder "OOPSEvaluation" contains the resources produced by the OOPS! pitfall scanner (if selected)
- The folder "resources" contains the styles and javascript used in the documentation
- The folder "sections" contains the HTML used for each of the sections in the main document. This is separated for your convenience, as the cross-reference section (the one containing the description of the classes, properties and data properties of your ontology) is often too big to edit the rest of the HTML comfortably. This way you may also edit the introduction section once and refresh the just the cross-reference section when you change the main ontology.
- The folder "webvowl" contains the resources necessary to visualize the ontology.
- The .htaccess file contains the rules needed to do content negotiation of your ontology. I recommend double-checking this file in a local tomcat server before setting it up in production.
- The 406.html file is there to notify a user or computer program in case an unsupported serialization is requested.
- The index-en.html contains the metadata description of your ontology and assembles together all the sections for the document.
- The ontology.json, ontology.xml, ontology.nt and ontology.ttl are different serializations of your ontology to download.
6. WIDOCO through command line
WIDOCO can be executed from the command line in case you want to set it up in an automated manner in your workflow. All the flags that may be used for configuration (which are the same as the features descibed in this document) can be seen in detail in the "How to use WIDOCO" section of the readme file in the GitHub repository.
This tutorial has been written by Daniel Garijo.